Flask Bootstrap 5 Volt
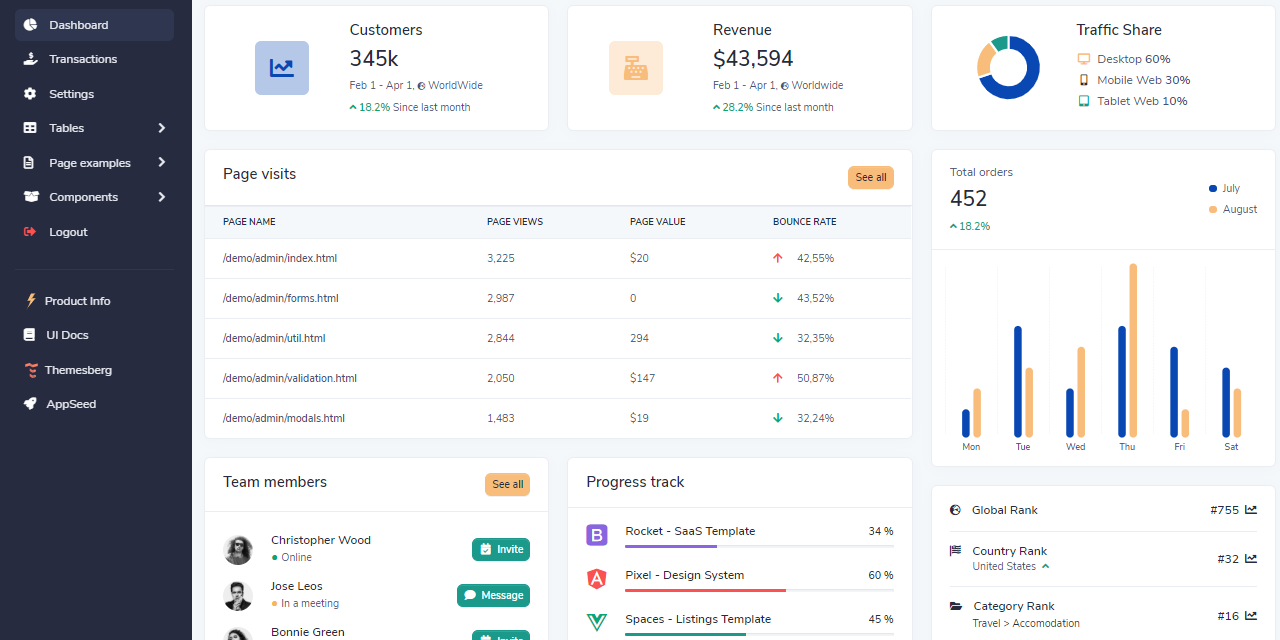
Flask Bootstrap 5 dashboard generated by the AppSeed platform with basic modules, database, authentication and deployment scripts on top of Volt Dashboard (free version). Volt Dashboard is a free and open source Bootstrap 5) dashboard template featuring over 100 components, 11 example pages and 3 plugins with Vanilla JS. There are more than 100 free Bootstrap 5 components included some of them being buttons, alerts, modals, datepickers and so on.
Features
- Up-to-date dependencies: Flask 2.0.1
- SCSS compilation via Gulp
- DBMS: SQLite, PostgreSQL (production)
- DB Tools: SQLAlchemy ORM, Flask-Migrate (schema migrations)
- Modular design with Blueprints, simple codebase
- Session-Based authentication (via flask_login), Forms validation
- Deployment scripts: Docker, Gunicorn / Nginx, Heroku
- Support via Github and Discord.
Links
- Flask Bootstrap 5 Volt - product page
- Flask Bootstrap 5 Volt - LIVE deployment
- Flask Bootstrap 5 Volt - product documentation
PRO versions include Premium UI Kits, Lifetime updates and 24/7 LIVE Support (via Discord)
| Flask Datta PRO | Flask Soft PRO | Flask Volt PRO |
|---|---|---|
 |
 |
 |
$ # Get the code
$ git clone https://github.com/app-generator/flask-dashboard-volt.git
$ cd flask-dashboard-volt
$
$ # Virtualenv modules installation (Unix based systems)
$ virtualenv env
$ source env/bin/activate
$
$ # Virtualenv modules installation (Windows based systems)
$ # virtualenv env
$ # .\env\Scripts\activate
$
$ # Install modules - SQLite Database
$ pip3 install -r requirements.txt
$
$ # OR with PostgreSQL connector
$ # pip install -r requirements-pgsql.txt
$
$ # Set the FLASK_APP environment variable
$ (Unix/Mac) export FLASK_APP=run.py
$ (Windows) set FLASK_APP=run.py
$ (Powershell) $env:FLASK_APP = ".\run.py"
$
$ # Set up the DEBUG environment
$ # (Unix/Mac) export FLASK_ENV=development
$ # (Windows) set FLASK_ENV=development
$ # (Powershell) $env:FLASK_ENV = "development"
$
$ # Start the application (development mode)
$ # --host=0.0.0.0 - expose the app on all network interfaces (default 127.0.0.1)
$ # --port=5000    - specify the app port (default 5000)
$ flask run --host=0.0.0.0 --port=5000
$
$ # Access the dashboard in browser: http://127.0.0.1:5000/
Note: To use the app, please access the registration page and create a new user. After authentication, the app will unlock the private pages.
The project is coded using blueprints, app factory pattern, dual configuration profile (development and production), and an intuitive structure presented below:
< PROJECT ROOT >
   |
   |-- apps/
   |    |
   |    |-- home/                          # A simple app that serve HTML files
   |    |    |-- routes.py                 # Define app routes
   |    |
   |    |-- authentication/                # Handles auth routes (login and register)
   |    |    |-- routes.py                 # Define authentication routes
   |    |    |-- models.py                 # Defines models
   |    |    |-- forms.py                  # Define auth forms (login and register)
   |    |
   |    |-- static/
   |    |    |-- <css, JS, images>         # CSS files, Javascripts files
   |    |
   |    |-- templates/                     # Templates used to render pages
   |    |    |-- includes/                 # HTML chunks and components
   |    |    |    |-- navigation.html      # Top menu component
   |    |    |    |-- sidebar.html         # Sidebar component
   |    |    |    |-- footer.html          # App Footer
   |    |    |    |-- scripts.html         # Scripts common to all pages
   |    |    |
   |    |    |-- layouts/                   # Master pages
   |    |    |    |-- base-fullscreen.html  # Used by Authentication pages
   |    |    |    |-- base.html             # Used by common pages
   |    |    |
   |    |    |-- accounts/                  # Authentication pages
   |    |    |    |-- login.html            # Login page
   |    |    |    |-- register.html         # Register page
   |    |    |
   |    |    |-- home/                      # UI Kit Pages
   |    |         |-- index.html            # Index page
   |    |         |-- 404-page.html         # 404 page
   |    |         |-- *.html                # All other pages
   |    |
   |  config.py                             # Set up the app
   |    __init__.py                         # Initialize the app
   |
   |-- requirements.txt                     # Development modules - SQLite storage
   |-- requirements-mysql.txt               # Production modules  - Mysql DMBS
   |-- requirements-pqsql.txt               # Production modules  - PostgreSql DMBS
   |
   |-- Dockerfile                           # Deployment
   |-- docker-compose.yml                   # Deployment
   |-- gunicorn-cfg.py                      # Deployment
   |-- nginx                                # Deployment
   |    |-- appseed-app.conf                # Deployment
   |
   |-- .env                                 # Inject Configuration via Environment
   |-- run.py                               # Start the app - WSGI gateway
   |
|-- ************************************************************************To recompile SCSS files, follow this setup:
Step #1 - Install tools
Step #2 - Change the working directory to assets folder
$ cd apps/static/assetsStep #3 - Install modules (this will create a classic node_modules directory)
$ npm install
// OR
$ yarn
Step #4 - Edit & Recompile SCSS files
$ gulp scssThe generated file is saved in static/assets/css directory.
The app is provided with a basic configuration to be executed in Docker, Heroku, Gunicorn, and Waitress.
Docker execution
The application can be easily executed in a docker container. The steps:
Get the code
$ git clone https://github.com/app-generator/flask-dashboard-volt.git
$ cd flask-dashboard-volt
Start the app in Docker
$ sudo docker-compose pull && sudo docker-compose build && sudo docker-compose up -dVisit http://localhost:85 in your browser. The app should be up & running.
Steps to deploy on Heroku
- Create a FREE account on Heroku platform
- Install the Heroku CLI that match your OS: Mac, Unix or Windows
- Open a terminal window and authenticate via
heroku logincommand - Clone the sources and push the project for LIVE deployment
$ # Clone the source code:
$ git clone https://github.com/app-generator/flask-dashboard-volt.git
$ cd flask-dashboard-volt
$
$ # Check Heroku CLI is installed
$ heroku -v
heroku/7.25.0 win32-x64 node-v12.13.0 # <-- All good
$
$ # Check Heroku CLI is installed
$ heroku login
$ # this commaond will open a browser window - click the login button (in browser)
$
$ # Create the Heroku project
$ heroku create
$
$ # Trigger the LIVE deploy
$ git push heroku master
$
$ # Open the LIVE app in browser
$ heroku open
Gunicorn 'Green Unicorn' is a Python WSGI HTTP Server for UNIX.
Install using pip
$ pip install gunicornStart the app using gunicorn binary
$ gunicorn --bind 0.0.0.0:8001 run:app
Serving on http://localhost:8001
Visit http://localhost:8001 in your browser. The app should be up & running.
Waitress (Gunicorn equivalent for Windows) is meant to be a production-quality pure-Python WSGI server with very acceptable performance. It has no dependencies except ones that live in the Python standard library.
Install using pip
$ pip install waitressStart the app using waitress-serve
$ waitress-serve --port=8001 run:app
Serving on http://localhost:8001
Visit http://localhost:8001 in your browser. The app should be up & running.
- Flask Framework - The offcial website
- Boilerplate Code - Index provided by AppSeed
- Boilerplate Code - Index published on Github
Flask Bootstrap 5 Volt - Provided by AppSeed App Generator.